 Pin It
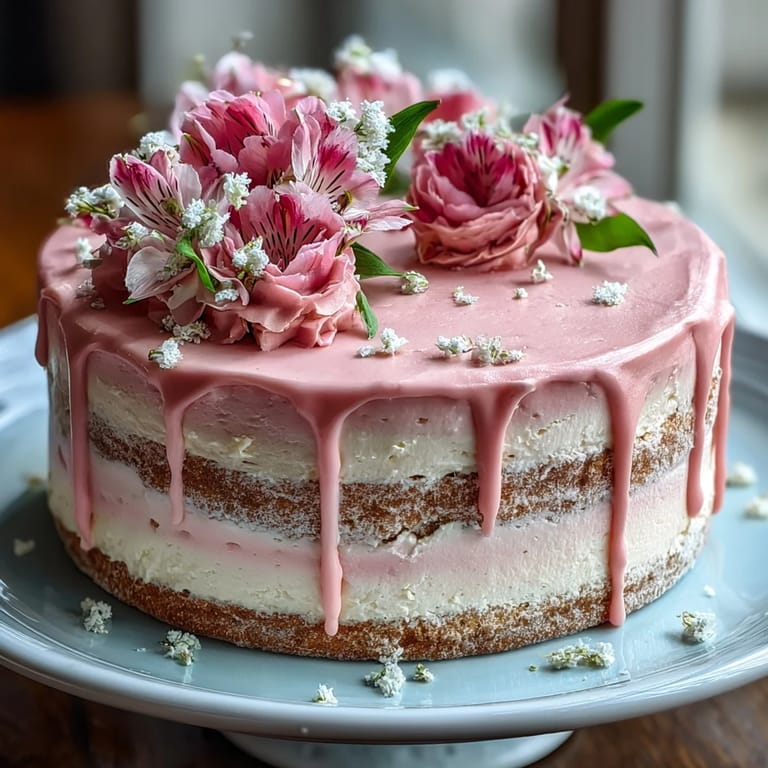
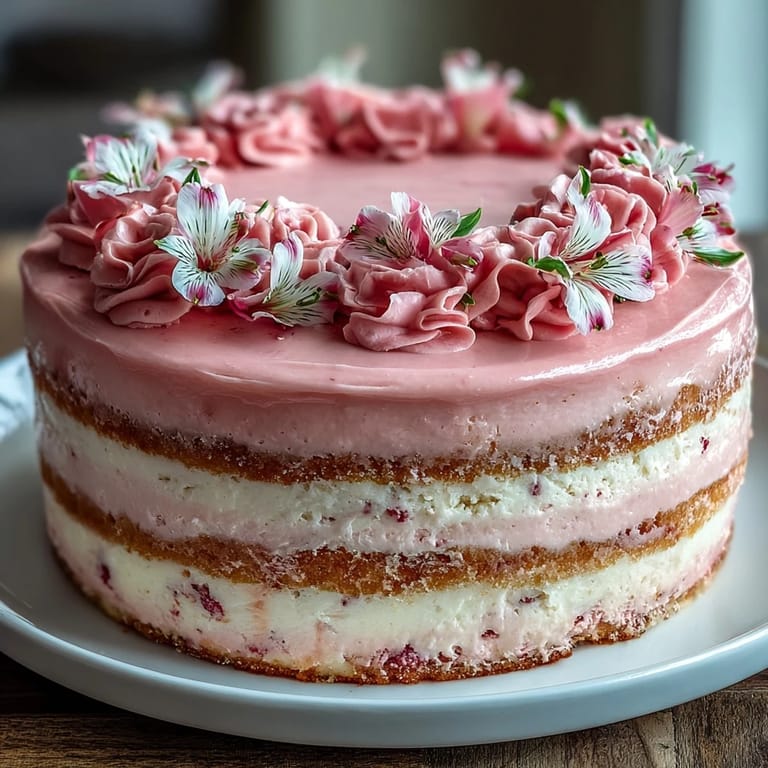
 My sister called me three weeks before Mother's Day in a panic—she'd promised Mom a homemade cake but had no idea where to start. I found myself in the kitchen on a rainy Saturday afternoon, pulling out my stand mixer and thinking about how Mom always said the best gifts take time, not money. That's when I decided to make something that looked as beautiful as it tasted: a tender vanilla cake dressed in soft pink ombre buttercream with delicate flowers cascading down the sides. Watching my sister frost her first layer, seeing her face light up when the ombre came together, reminded me why we cook for the people we love.
I'll never forget my neighbor poking her head over the fence while I was carrying this cake to Mom's birthday brunch, asking if I'd ordered it from the bakery down the street. The pride I felt correcting her was silly but real—this cake has a way of making you feel like you've accomplished something genuinely special. When Mom cut into it and found those three perfect layers with their ombre gradient, she actually got teary, and suddenly an hour of careful frosting felt like the best hour I'd spent in months.
Ingredients
- All-purpose flour (2 ½ cups): The foundation of a tender crumb—make sure it's measured by spooning and leveling, not scooping, or you'll end up with a dense cake.
- Baking powder (2 ½ tsp): This is what gives the cake its light, airy lift, so don't skip checking the expiration date on the tin.
- Unsalted butter (1 cup plus 1 ½ cups): Room temperature is non-negotiable here; cold butter won't cream properly and you'll lose all that fluffy texture.
- Granulated sugar (2 cups): The creaming process with butter creates tiny air pockets that make the cake rise beautifully and stay soft.
- Eggs (4 large): Room temperature eggs blend smoothly into the butter mixture without breaking the emulsion—I learned this the hard way with cold eggs once.
- Vanilla extract (1 tbsp plus 2 tsp): Use pure vanilla, not imitation; the difference becomes obvious once you taste the baked cake.
- Whole milk (1 cup): Also needs to be room temperature, and it's what keeps these layers from drying out.
- Powdered sugar (5 cups): Sift it before adding or your buttercream will have tiny lumps that no amount of beating fixes.
- Pink food coloring (gel): Gel coloring is thicker and won't thin out your buttercream like liquid coloring does, plus the color stays vibrant longer.
- Edible flowers: Violets, pansies, and rose petals are your best bets—make sure they're actually edible and haven't been sprayed with pesticides.
Tired of Takeout? 🥡
Get 10 meals you can make faster than delivery arrives. Seriously.
One email. No spam. Unsubscribe anytime.
Instructions
- Prep your pans like you mean it:
- Preheat the oven to 350°F and grease those three 8-inch pans really well, then line them with parchment paper cut to fit the bottom. This two-step approach means your cake won't stick to the sides, and you'll be able to turn them out cleanly.
- Dry ingredients first:
- Whisk together the flour, baking powder, and salt in a bowl and set it aside—this distributes the leavening evenly so you don't end up with dense pockets.
- Cream the butter and sugar:
- Beat the room-temperature butter and sugar together for about 3 to 4 minutes until it's light, pale, and fluffy like clouds. You'll actually notice the color change and the texture becoming airy; that's when you know you're ready for the eggs.
- Add eggs one at a time:
- Drop in each egg and beat well after each addition—this might take 5 to 6 minutes total, but it creates an emulsion that traps air and keeps the cake tender. Mix in the vanilla once all the eggs are incorporated.
- Alternate wet and dry:
- Add the flour mixture in thirds, alternating with the milk and starting and ending with flour. Mix on low speed and stop as soon as everything is combined; overmixing at this stage toughens the cake.
- Divide and bake:
- Pour the batter evenly into the three pans and smooth the tops with a spatula. Bake for 25 to 30 minutes until a toothpick comes out clean and the tops are golden and spring back when you touch them lightly.
- Cool with patience:
- Let the cakes sit in their pans for 10 minutes—this is crucial or they'll crumble when you flip them—then turn them out onto cooling racks and let them come completely to room temperature.
- Make the buttercream base:
- Beat the room-temperature butter on high for 2 to 3 minutes until it's creamy and pale, then gradually add the sifted powdered sugar on low speed to avoid a cloud of sugar in your face. Add the vanilla and milk, then beat on high for another 3 minutes until it's fluffy and light.
- Create your ombre shades:
- Divide the buttercream into four equal bowls—leave one white and add increasingly more gel food coloring to the other three to get white, light pink, medium pink, and deep pink. This gradation is what makes the cake look magazine-worthy.
- Layer and frost strategically:
- Place the first cake layer on your serving plate and spread the darkest pink buttercream on top, then add the second layer and spread medium pink on that, then the final layer with light pink on top. Use the remaining white buttercream for the sides or blend it into the sides to soften the ombre effect.
- Smooth and blend:
- Use an offset spatula to smooth the entire cake, and if you're feeling fancy, use a bench scraper to gently blend where the colors meet on the sides. The blending takes patience but creates that dreamy ombre effect people gasp at.
- Chill before decorating:
- Put the cake in the fridge for at least 30 minutes so the buttercream firms up—this makes adding flowers easier and helps you get clean slices later.
- Final flower flourish:
- Just before serving, arrange your edible flowers on top and around the cake, pressing them gently into the buttercream. Fresh flowers stay pretty for a few hours, so time this step as close to serving as possible.
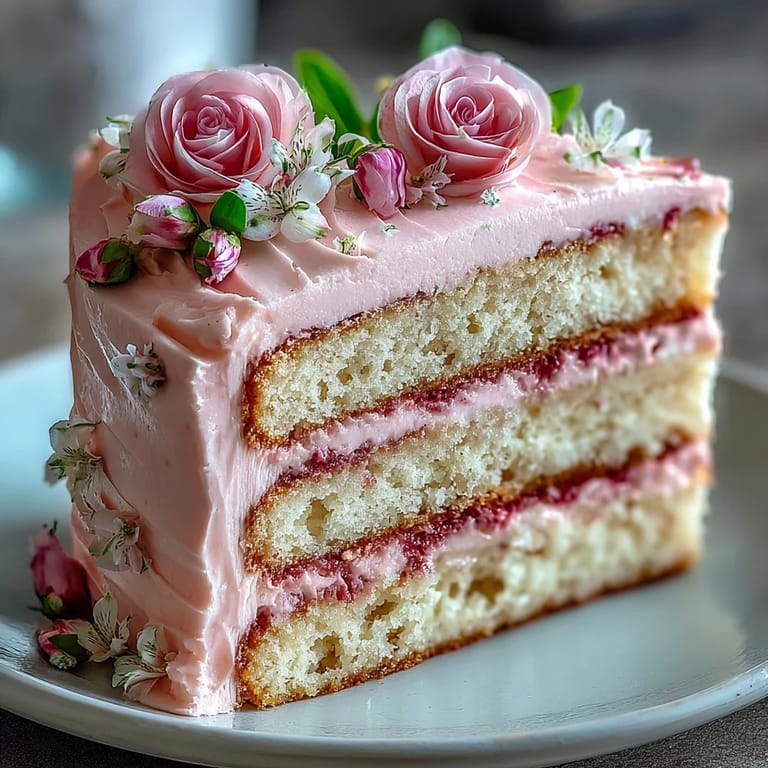
 Pin It
 There's something almost sacred about watching someone's face when they realize you made a celebration cake from scratch—the way they look at it, the way they taste it, the way they tell everyone who will listen that you baked it yourself. That's the real reason to make this cake, not for the Instagram-worthy ombre or the delicate flowers, but for that moment when homemade becomes the best gift you could possibly give.
Why the Vanilla Matters Here
Vanilla isn't just background flavor in this cake—it's actually the star that lets everything else shine. Since the cake itself is intentionally simple and neutral, using pure vanilla extract instead of imitation makes a noticeable difference in depth and richness. The buttercream echoes that vanilla note, which keeps the whole cake cohesive rather than feeling like two different desserts stacked together.
The Ombre Technique Simplified
The ombre effect intimidates people, but honestly it's just a matter of having different shades ready before you start frosting. The key is to commit to the color progression and not overthink the blending—sometimes the slight imperfections between shades are what make it look handmade and charming. I've found that a bench scraper works better than a spatula for creating that soft gradient where colors meet, but even without one, a simple offset spatula and a gentle hand do the trick.
Timing and Make-Ahead Strategy
This cake is actually ideal for making ahead because the vanilla layers stay moist when wrapped well and refrigerated or frozen for up to a week. You can bake the layers days in advance, freeze them unfrosted, and then thaw and frost them the morning of the celebration. This means less stress on the actual day and more time to focus on making the decoration special rather than rushing through the baking.
- Bake layers up to a week ahead and store them wrapped in plastic wrap in the refrigerator, or freeze them for up to three weeks.
- Make the buttercream the day before and store it in an airtight container in the fridge, then bring it to room temperature and beat it again before frosting.
- Assemble and decorate the cake no more than a few hours before serving so the buttercream stays fresh and the flowers look their best.
 Pin It
 Making this cake for someone you love is one of the kindest things you can do in your kitchen, and I promise it's more achievable than you think. Every time someone takes a bite and closes their eyes at that tender crumb and silky frosting, you'll know exactly why you spent the time.
Recipe Q&A
- → How to achieve the pink ombre effect on the buttercream?
Divide the buttercream into four portions; leave one plain and tint the others with increasing amounts of pink gel coloring to create a gradient effect.
- → What’s the best way to bake even cake layers?
Use three 8-inch pans lined with parchment, distribute batter evenly, and bake until a toothpick comes out clean for uniform layers.
- → Can I use a different type of milk in the sponge?
Whole milk is recommended for moisture and richness, but alternatives like dairy or plant-based milks may be used with slight texture variation.
- → How should the edible flowers be prepared before decorating?
Use only edible, pesticide-free flowers and gently place them just before serving to maintain freshness and appearance.
- → What tips help make the buttercream smooth and fluffy?
Beat the butter until creamy first, add sifted powdered sugar gradually, then beat at high speed after adding vanilla and milk for a light texture.