 Pin It
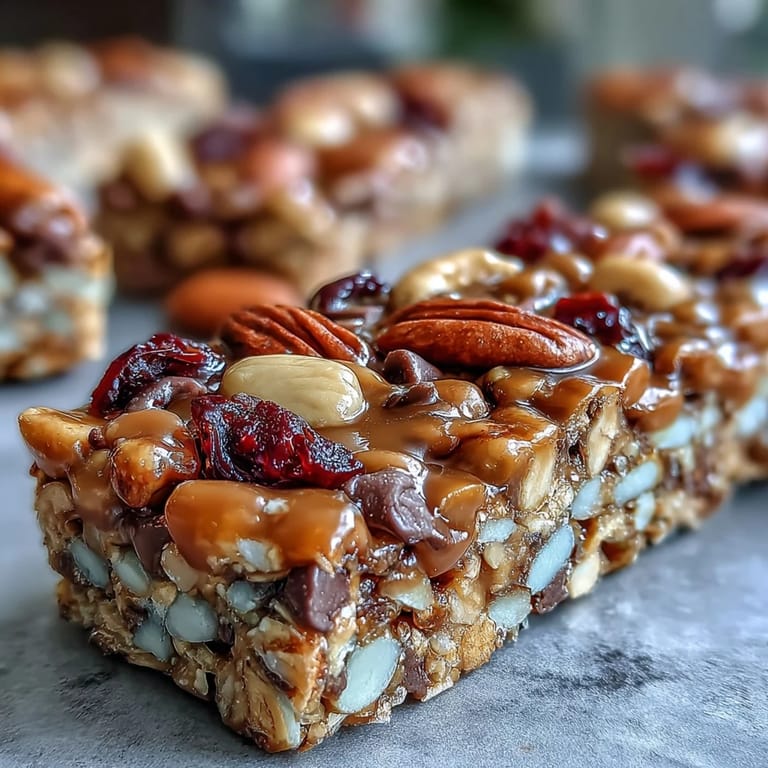
 Last summer, I was scrambling to pack for a hiking trip when I realized I'd forgotten to prep snacks. Standing in my kitchen at 11 p.m., I dumped whatever I had into a bowl—oats, nuts, some dried cranberries—mixed it with peanut butter and honey, pressed it flat, and threw it in the fridge. By morning, I had these chewy, satisfying bars that tasted nothing like store-bought granola. My hiking buddies couldn't stop asking what they were, and I realized I'd accidentally created something I'd be making forever.
I made these for my nephew's school field trip last spring, and he came home talking about how everyone wanted to trade snacks with him. That feeling of knowing I'd sent something into the world that made someone's day a little better—that's when I stopped thinking of them as just energy bars and started seeing them as little packages of care you can hand to people you love.
Ingredients
- Old-fashioned rolled oats (2 cups): The backbone of these bars; they give you that chewy texture and staying power that keeps you satisfied through your afternoon.
- Crisp rice cereal (1 cup): This adds a subtle crunch and keeps the bars from becoming too dense, plus it stretches your ingredients further.
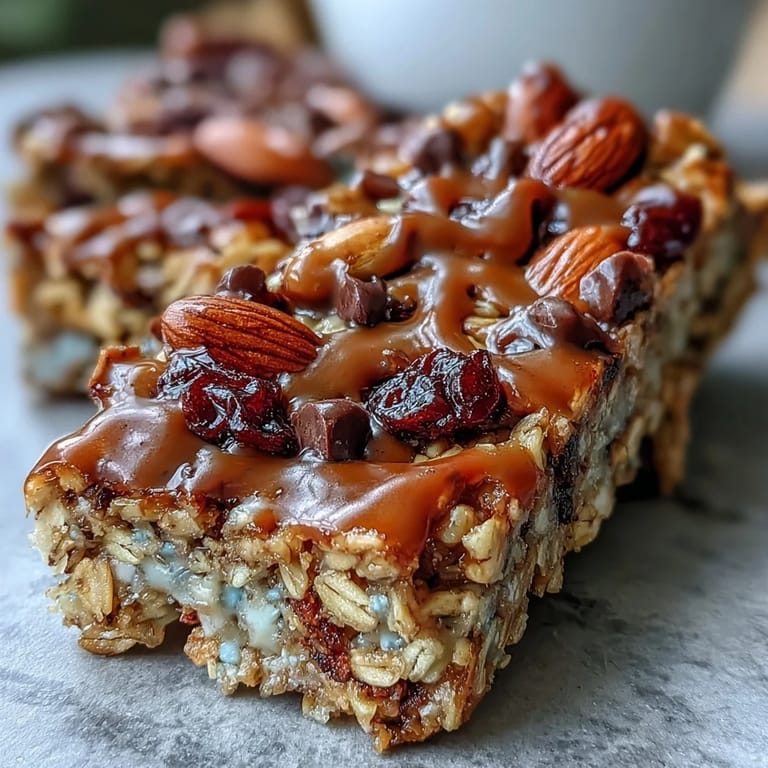
- Mixed nuts (1/2 cup chopped): Almonds, walnuts, or pecans work beautifully; they provide protein and a satisfying bite that makes these feel substantial.
- Dried fruit (1/2 cup): Cranberries, raisins, or chopped apricots bring natural sweetness and little bursts of flavor throughout.
- Unsweetened shredded coconut (1/4 cup, optional): If you use this, it adds a tropical note and extra texture, but skip it if coconut isn't your thing.
- Salt (1/4 teaspoon): Just a pinch to make all the flavors sing together and balance the sweetness.
- Honey or maple syrup (1/2 cup): This is your binder; honey gives a lighter flavor while maple syrup adds earthiness, so choose based on your mood.
- Creamy peanut butter or almond butter (1/3 cup): The other half of your binding agent—use natural versions if you can, as they mix more smoothly when warmed.
- Vanilla extract (1 teaspoon): A small addition that rounds out all the flavors and makes them taste less clinical and more like something you'd actually want to eat.
- Mini chocolate chips (1/4 cup, optional): For when you want a touch of indulgence; add them after the warm mixture cools slightly or they'll melt into a puddle.
- Chia seeds or flaxseed meal (1 tablespoon, optional): A quiet nutritional boost that adds texture without announcing itself too loudly.
Tired of Takeout? 🥡
Get 10 meals you can make faster than delivery arrives. Seriously.
One email. No spam. Unsubscribe anytime.
Instructions
- Prepare your pan:
- Line an 8-inch square baking pan with parchment paper, letting some overhang on two sides so you can lift the finished bars out easily. This step saves you from having to scrape and scrub later.
- Combine the dry team:
- In a large bowl, toss together the oats, rice cereal, chopped nuts, dried fruit, coconut if using, and salt. Make sure everything is mixed evenly so no one ingredient dominates.
- Warm the sticky stuff:
- In a small saucepan over low heat, stir the honey and peanut butter together until they're melted and smooth—this takes about 2 to 3 minutes and smells absolutely incredible. Take it off the heat and stir in the vanilla.
- Bring it all together:
- Pour the warm honey mixture over your dry ingredients and stir thoroughly until every bit is coated and the mixture comes together like a chunky dough. Don't worry if it feels loose at this point; it'll firm up as it chills.
- The chocolate chip moment:
- If you're using chocolate chips, wait 2 to 3 minutes for the mixture to cool slightly, then fold them in gently. This way they stay as chips instead of turning into melted streaks.
- Press into the pan:
- Transfer everything to your prepared pan and use a spatula or the back of a measuring cup to press it down firmly and evenly. You want it compact but not rock-hard.
- Top it off:
- Sprinkle extra chocolate chips or nuts on top if you want, pressing them in gently so they stick around after cutting.
- The patience part:
- Refrigerate for at least 1 hour until the bars are set and hold together when you slice them. I usually leave mine overnight because I like them extra firm.
- Cut and store:
- Use the parchment overhang to lift the whole block out, then slice into 12 bars with a sharp knife (run it under hot water between cuts for cleaner slices). Store them in an airtight container in the fridge for up to a week.
 Pin It
 There was this one rainy afternoon when my friend showed up at my door feeling overwhelmed, and I grabbed a couple of these bars from my fridge without thinking. We sat on my porch watching the rain, barely talking, just eating and breathing, and something about having made these with my own hands to share with her made the whole moment feel less lonely. That's the thing about making food for people—it's proof that you care, no words required.
Why These Bars Became My Go-To
Early on, I tried making these bars with store-bought granola thinking it would be a shortcut, but they turned into a soggy, unappetizing mess. Since then, I've learned that building from oats and rice cereal gives you way more control over the texture and taste—plus you know exactly what's going in. The simplicity is the whole point; there's nothing to hide behind, which somehow makes them feel more special than anything fancier I could make.
Customizing Without Losing the Magic
The beauty of these bars is that they're a blank canvas for whatever you have lying around. I've made versions with cardamom and dates, another batch with cinnamon and raisins, and once even threw in some roasted seeds when I forgot to buy nuts. The core ratio of oats, cereal, honey, and peanut butter stays the same, but everything else adapts to your mood, your pantry, or dietary needs.
The Practical Side
What makes these bars actually stick in my routine is that they're forgiving and real-life friendly. You can make a batch on a Sunday afternoon and have grab-and-go snacks for the next week without any fussing. They're sturdy enough to throw in a backpack, delicious enough that you actually look forward to eating them, and nutritious enough that you don't feel weird about having them for breakfast.
- If you want nut-free bars, swap the peanut butter for sunflower seed butter and use seeds instead of tree nuts.
- For vegan versions, just use maple syrup instead of honey and grab some dairy-free chocolate chips.
- These freeze beautifully for up to two months, so double the batch and you're set for emergencies.
 Pin It
 These bars have become the answer to so many kitchen problems—what to bring to a picnic, how to handle a 3 p.m. energy slump, what to make when someone unexpected drops by hungry. They're proof that the best recipes are the ones that solve actual problems in your life while tasting like you put real care into them.
Recipe Q&A
- → Can I use other nut butters?
Yes, sunflower seed butter is a great nut-free substitute that works well in this mix.
- → How do I prevent chocolate chips from melting?
Allow the nut and syrup mixture to cool slightly before folding in chocolate chips to maintain their shape.
- → Are these bars gluten-free?
Use certified gluten-free oats and cereals to ensure the bars are gluten-free.
- → Can I add spices for flavor?
Absolutely, spices like cinnamon or cardamom add a warming depth to the bars.
- → How should I store the bars?
Keep them in an airtight container in the refrigerator for up to one week to maintain freshness.